Deploy Your Flask App: Simply, Hassle-Free, and Affordably
For context, this post is being made specifically for my 4Geeks web dev students. The full-stack web course culminates with the completion of a final project that involves creating a RESTful client-server based web app. The specific technologies are Python Flask + PostgreSQL for the back-end and React for the front-end. The official 4Geeks course doesn’t get into how to actually deploy the applications so that’s what this post is for.
The three things I look for in deployment strategies are simplicity, ease of use, and affordability. Often times, the choice when deciding between deployment strategies comes down to optimizing for 2/3 of the qualities mentioned above. Which two you should optimize for depends on your use case. The use case we’ll be looking at here is the following…
- We need to host a Flask API
- We need to be able to create/access a SQL database from the Flask API
- We need the deployment process is to be fairly user friendly, target audience is new to software.
- We need the hosting to be free to almost free (This is for small portfolio projects not commercial products)
As a side note, this architecture also scales pretty well. Its not just for small projects. The distinction is that managing more traffic/compute leads to higher spending, potentially making this not as good a solution on the affordability scale.
Points 3 and 4 above direct us to optimize for ease of use, and affordability. This effectively means that we’re conciously sacrificing some simplicity in our deployment strategy. To be clear, by simplicity I mean, how difficult the system is to understand conceptually. The deployment model can be easy to use (high ease of use) but more difficult to understand (often the case with distributed cloud environments).
We’ll be using a service called Google Cloud Run(manages the Flask API) and Supabase(manages the PostgreSQL server) for hosting/managing our backends. These are both managed solutions; managed means that we’re not provisioning nor maintaining the underlying infrastructure (VMs, updates, backups, etc).
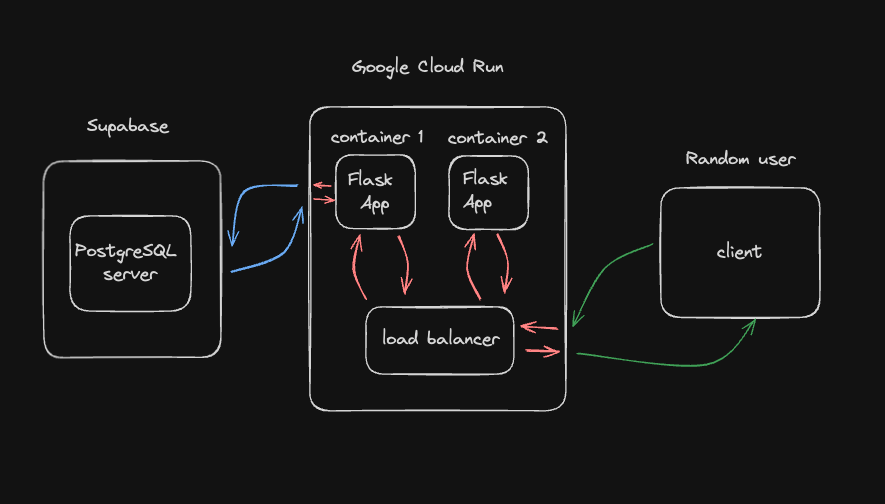 Cloud Run will handle spinning up instances of our Flask app when it receives requests. Supabase will manage our postgres database so we dont have to worry about maintenance.
Pre-requisites
Before we get started you’ll have to create two accounts…
- Google Clound Platform (GCP) Account
- You will have to input a billing method but we’ll be safely within the free tier so we shouldn’t have to pay for anything. This is assuming no sudden and prolonged traffic spikes (like from DDoS attack).
- You should also create a GCP Project.

- Supabase Account
- Might also have to input billing for this platform but again, we should be well inside the free tier.
- Create new project

Also you will need to have a Python 3 version installed as well as pipenv for that python version.
You need one final piece of software to complete the deployment (Google Cloud Plaform CLI). Follow the directions here to install the gcloud cli tool that we’ll use to deploy our app. Once you have the gcloud cli installed run the following command…
Minimal Flask App
In order to deploy a Flask app, well… you actually need a Flask app to deploy so lets write up a minimal example app. Go to a folder/directory where you are comfortable making a new Flask app. I
usually do this from ~/projects. You can see the final result of the next few steps in this github repo.
|
|
Copy paste this code into ~/projects/test-flask-deployment/main.py
|
|
Now copy paste this into ~/projects/test-flask-deployment/templates/index.html
|
|
You can now start your Flask app by runnung the following commands
|
|
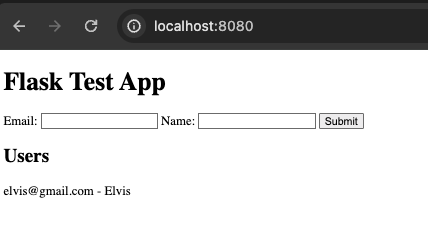
You can now visit your browser http://localhost:8080 and view the app and create some test users. Now we have an app we can deploy.
Deploying
At this point, if you view your postgres database on Supabase you’ll see two new tables

|
|
- When prompted for Source code location just press enter (i.e. accept default)
- When prompted for Service name just press enter (i.e. accept default)
- When prompted for region - enter
33 - When prompted to allow unauthenticated invocations enter
y
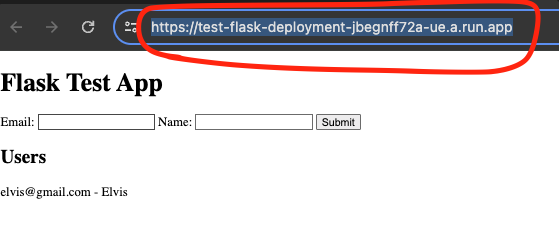
If the deployment is successful, the cli should give you a URL similar to https://test-flask-deployment-jbegnff72a-ue.a.run.app.
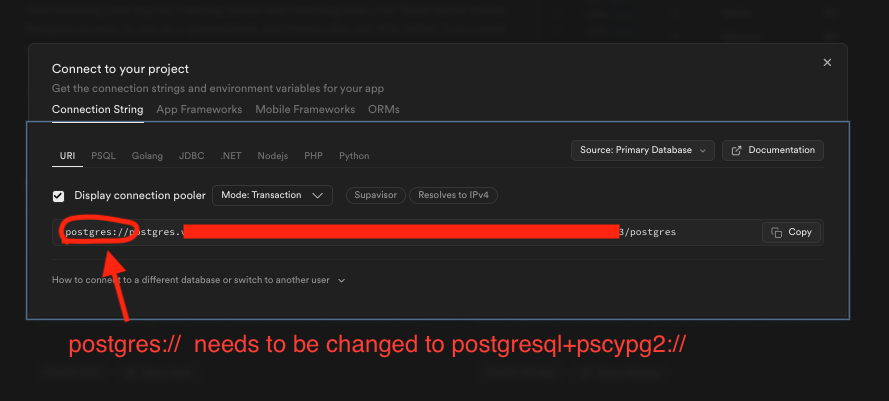
If you click on that link right away you’ll probably see a Service Unavailable message. This is because our production Flask app is expecting a DATABASE_URI environment variable to be defined but currently thats only defined locally.
Go to your Google Cloud Platform account and go to your Cloud Run service
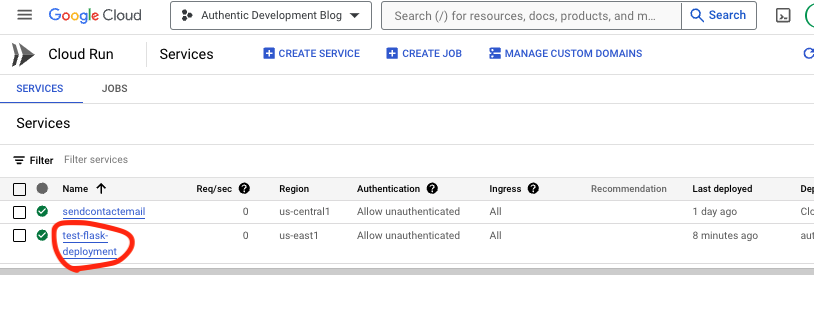
Click on your newly created service and edit it

Finally, add your DATABASE_URI environment variable into the VARIABLES & SECRETS section as a new variable and then deploy your app again.
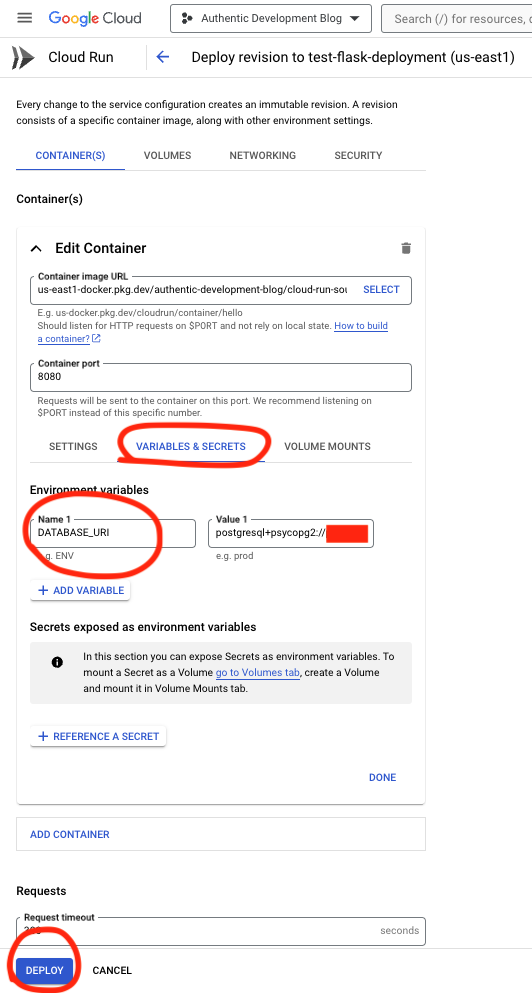
You might have two wait a couple minutes but now your Flask app is officially deployed and in production! Try creating some test users.
